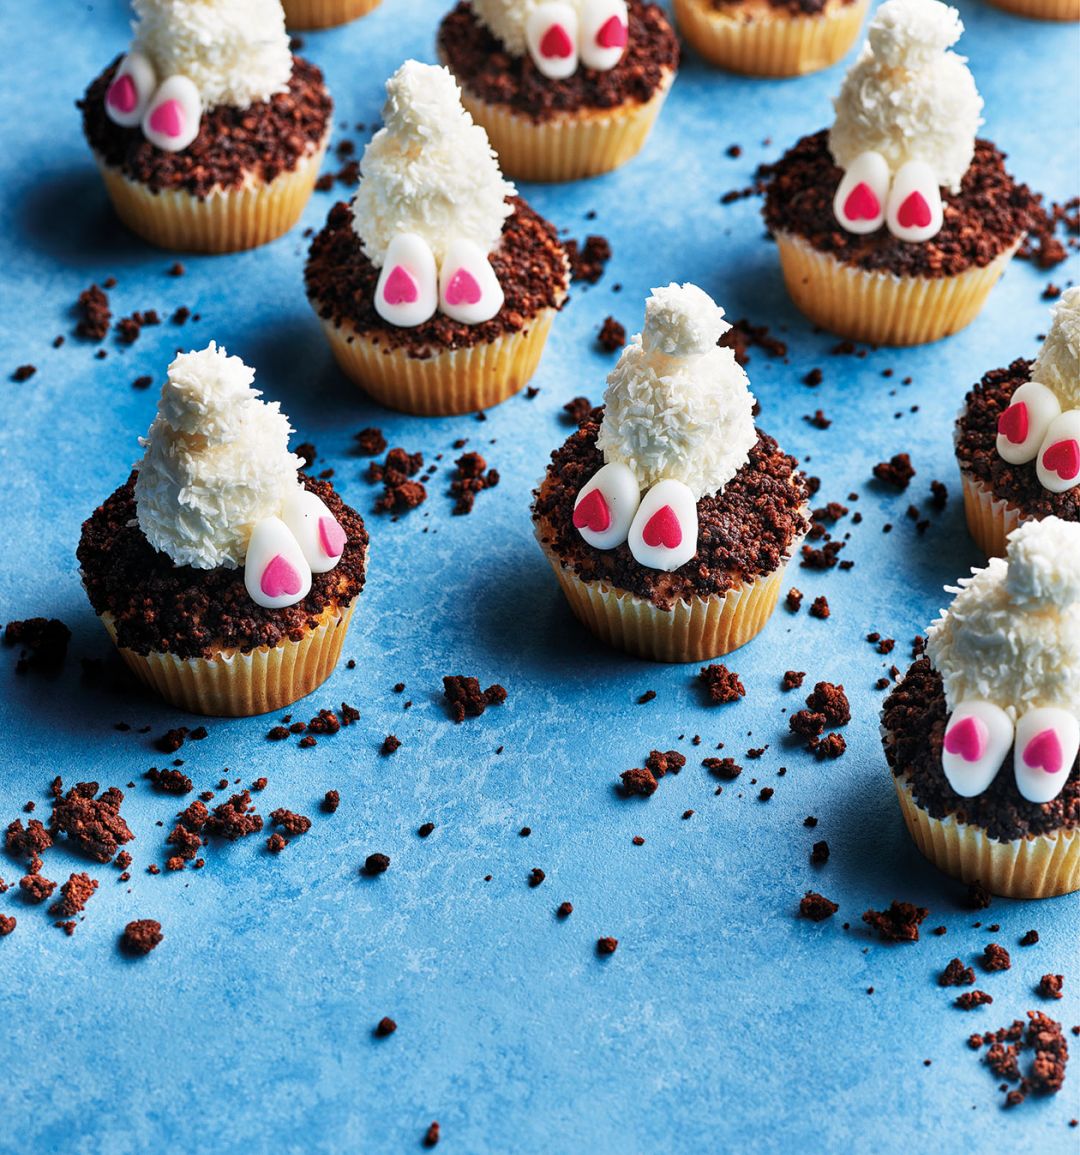
Easter bunny bottom cupcakes
Makes: 12
Recipe photograph by Kris Kirkham
Easter bunny bottom cupcakes
You can use shop-bought fairy cakes to make these fun Easter bunny bottom cupcakes - or bake your own for a bigger spring project
Makes: 12
See more recipes
Nutritional information (per serving)
Calories
271Kcal
Fat
9gr
Saturates
4gr
Carbs
44gr
Sugars
36gr
Fibre
1gr
Protein
2gr
Salt
0.2gr

Abigail Spooner
Abi is our Head of Food. She loves the precision and creativity of baking, turning fridge odds-and-ends into a weeknight pasta, and is always bookmarking new restaurants to try. She's happiest hosting friends around a table overflowing with food (and insisting everyone has seconds) or planning holidays around what to eat.
Ingredients
- 250g icing sugar, plus extra to dust
- 1 x 12 pack vanilla sponge fairy cakes (or bake your own)
- 2 double chocolate cookies (90g), crushed finely
- 30g ready-to-roll white icing
- heart confetti cake sprinkles
- 12 white marshmallows
- 12 mini white marshmallows
- 50g desiccated coconut
Step by step
- Sift the icing sugar into a bowl. Stir in enough water to give a thick, spreadable icing. Reserve a quarter then spread the rest over the top of each fairy cake; sprinkle generously with cookie crumb ‘soil’.
- Shape the ready-to-roll icing into 24 small eggs then press to flatten into ovals for the feet. Secure a pink heart sprinkle to each one with a tiny dab of icing, for the foot pad.
- Thin down the remaining icing with ½-1 tablespoon of water. Dunk the marshmallows in to coat, then roll in desiccated coconut.
- Assemble the different parts on each cake as in the picture, using the leftover icing to secure them together.


