Food
How to decorate a celebration cake
by Sarah Alcock
This is such a gorgeous idea for a Christening, birthday or Easter cake from Kate Emmett at Cake Poppins. You can use any colour of food dye you like and try your hand at making all sorts of animals. We'd love to see your efforts – if you give it a go, send a picture to feedback@sainsburysmagazine.co.uk. Tell us about your cake-decoration triumphs (and disasters!) in the comments box below.
What you'll need:
150g white ready-to-roll icing (or white marzipan)
Pink food dye
Greaseproof paper
Edible glue
Dry spaghetti or cocktail sticks
Knife
Black food dye or an edible ink black pen
What to do:
1. Break off about 20g of the icing (or marzipan) and set it aside – you'll use this for decoration later.
2. Knead the rest of the icing until it's soft, then add a little pink food dye (paste concentrates work best) and knead it again until the icing is pale pink all over.
3. Roll one third of the pink icing into an egg shape to make the rabbit's body, then place it on a small square of greaseproof paper. Using dry spaghetti or a cocktail stick, add a belly button and some 'stitching' while the icing is soft.

4. Roll two short, tapered sausages for the rabbit's legs and mark paws on the feet with a knife. Attach the legs to the body by brushing the ends with edible glue. It also helps if you insert a short piece of dry spaghetti or a cocktail stick into the end of the leg and push it into the body.
5. Break off a piece of the white icing you put aside earlier and roll it into 8 tiny balls. Squash them slightly, then glue them to the soles of the rabbit's feet to make 'pads'.
6. Roll two more tapered sausages from the pink icing – thinner this time – for the arms and use the edible glue to attach them to the body. Try to make the top of the body and arms as flat as possible – this will help to support the head. Insert a piece of dry spaghetti or a cocktail stick into the body with half of it sticking out the top – this will help you attach the head securely.
7. Roll a ball of pink icing for the head and attach this to the body using edible glue and the cocktail stick. Use a knife to make a smile, then use a piece of the white icing to make a nose. Attach this with edible glue. To make the eyes, either colour two tiny pieces of the white icing black or use an edible ink pen.
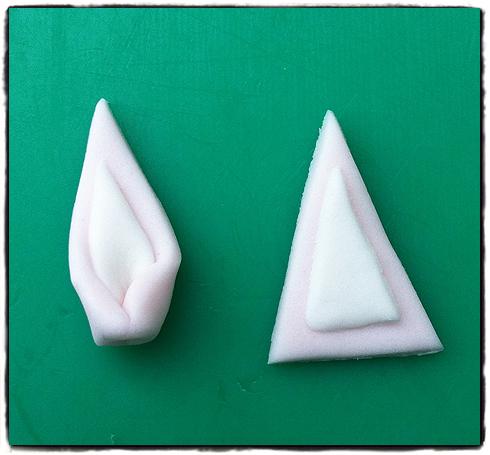
8. To make the rabbit's ears, roll out the remaining pink and white icing and cut out a triangle from each (the white triangle should be slightly smaller). Place the smaller triangle on top of the larger pink one and nip it in at the bottom to form an ear. Repeat to make the other ear, and attach to the head with edible glue.
9. If you'd like to add a bow, roll and cut out a thin two-inch strip of the white icing. Fold the ends into the middle and glue them in place to form the two loops of the bow, then glue a shorter strip around the middle of the loop to make the knot. Finally, glue two short strips to the rabbit's body for the ends of the ribbon and attach the bow.
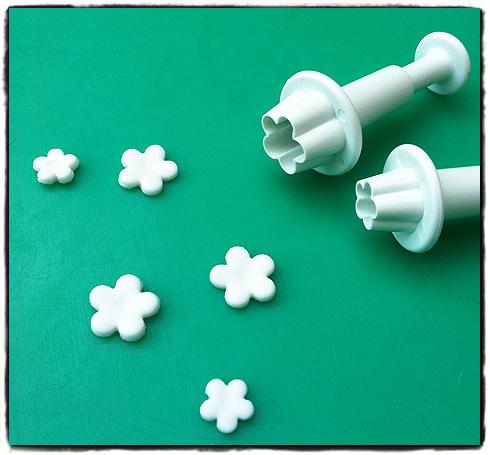
10. To make the flowers, roll out the last of the white icing and cut out the flowers using a small flower cutter. Glue a tiny ball of pink sugar into the centre of each flower to finish.
Tip
To ice a seven-inch cake, allow 750g icing.


